LiveMIC
LiveMIC has two parts to it. The first part is the client-side application, and the second is the server-side. We will look at the client side first and then the studio side for administrators.
🎙️ LiveMIC for presenters (client-side)
As a content provider, you only need to concern yourself with this part of LiveMIC. It's really simple to use and you can be on air in three clicks.
To open LiveMIC you will see a microphone icon just to the left of the On-Air controls progress bar. This is the icon that toggles the LiveMIC panel. If you haven't given the browser permission to access your microphone device at this stage, you will be prompted to do so.
Google Chrome is the recommended browser to use with LiveMIC
When the LiveMIC panel is open you will see it appear just below the On-Air controls. The panel is split into five sections:
Monitor
This allows you to control the volume you're hearing the studio feed at. This doesn't alter the volume of PlayoutONE in the studio, it only alters how you're hearing it locally. It also allows you to choose if you're listening to the Studio or the Internet Stream for the station. The stream URL used here is set up in settings by your administrator. See the Settings Admin section.
Connect
This is the button that allows you to connect to the studio or disconnect. When a successful connection is made it will be bright green.
Quick Keys
This toggles the quick keys visibility. When they're shown the log width will be halved and the quick keys will sit to the right of it.
Ducking
Controls when volume ducking is activated and how far it should duck. When activated, the volume of PlayoutONE will be altered based on the volume set here.
Mic
This is your microphone control. You can mute and unmute your mic here and also gain ride the mic volume. You should always see the green Vu meter pumping away even if the mic is off. This is so you can gauge and test the input volume without it going to the studio.
Note: You can open and close the mic using keys on the keyboard and also toggle the volume ducking: CTRL + LEFT CURSOR KEY = Open CTRL + RIGHT CURSOR KEY = Close CTRL + DOWN CURSOR KEY = Toggle Ducking CTRL + F1 = Play Next
This makes things a little easier especially if you want to map these keys to a mixer like the Airlite so the mic unmutes when the fade is opened for example.
🖥️ LiveMIC for technical teams (studio configuration)
To use LiveMIC, you need to set up the PlayoutONE Audio Engine or Studio Monitor application.
In PlayoutONE Pro's Settings > Hardware screen, you will also see a device for WebVT® LiveMIC Device. This device is used to clone the audio PlayoutONE is putting out as a clean feed, so would ideally be a virtual audio cable.
This is the device you also select in PlayoutONE Studio Monitor for the Studio device. If you don't want to use a virtual cable and are comfortable with setting up Clean Feed / Mix Minuses within your studio then this is also a good route to use.
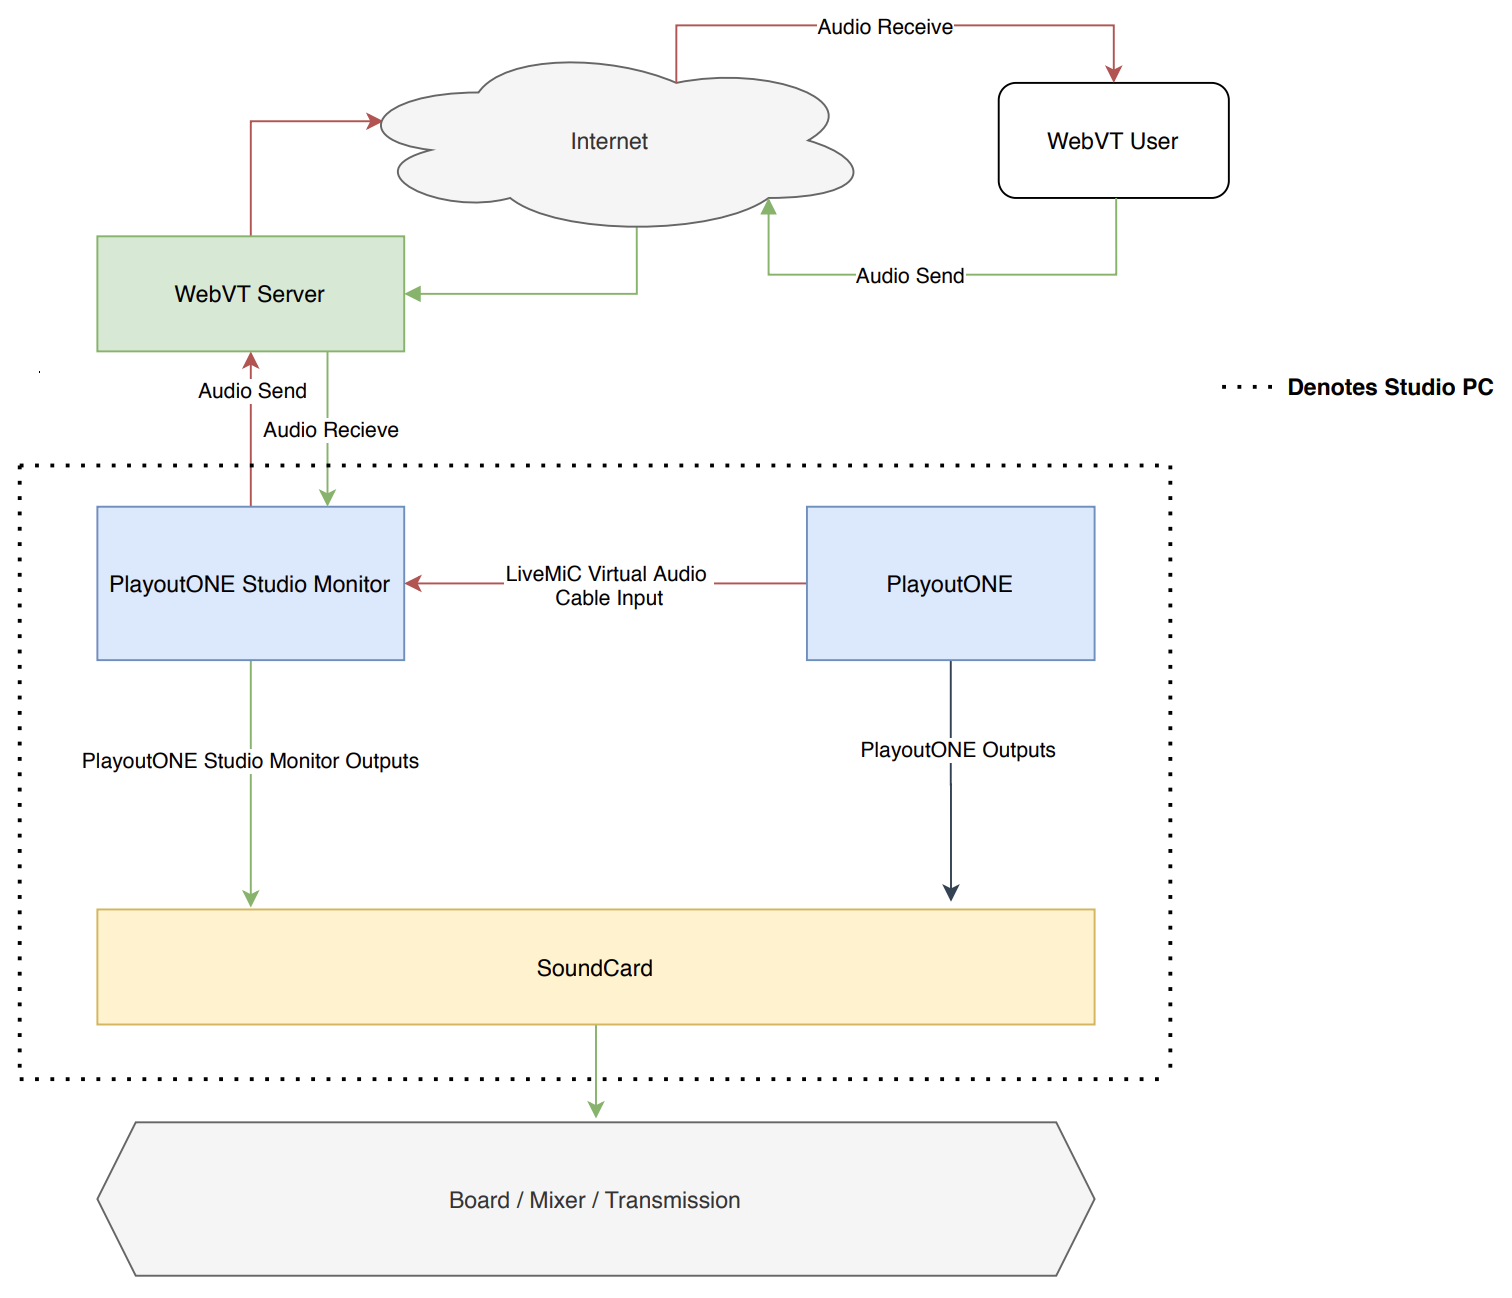
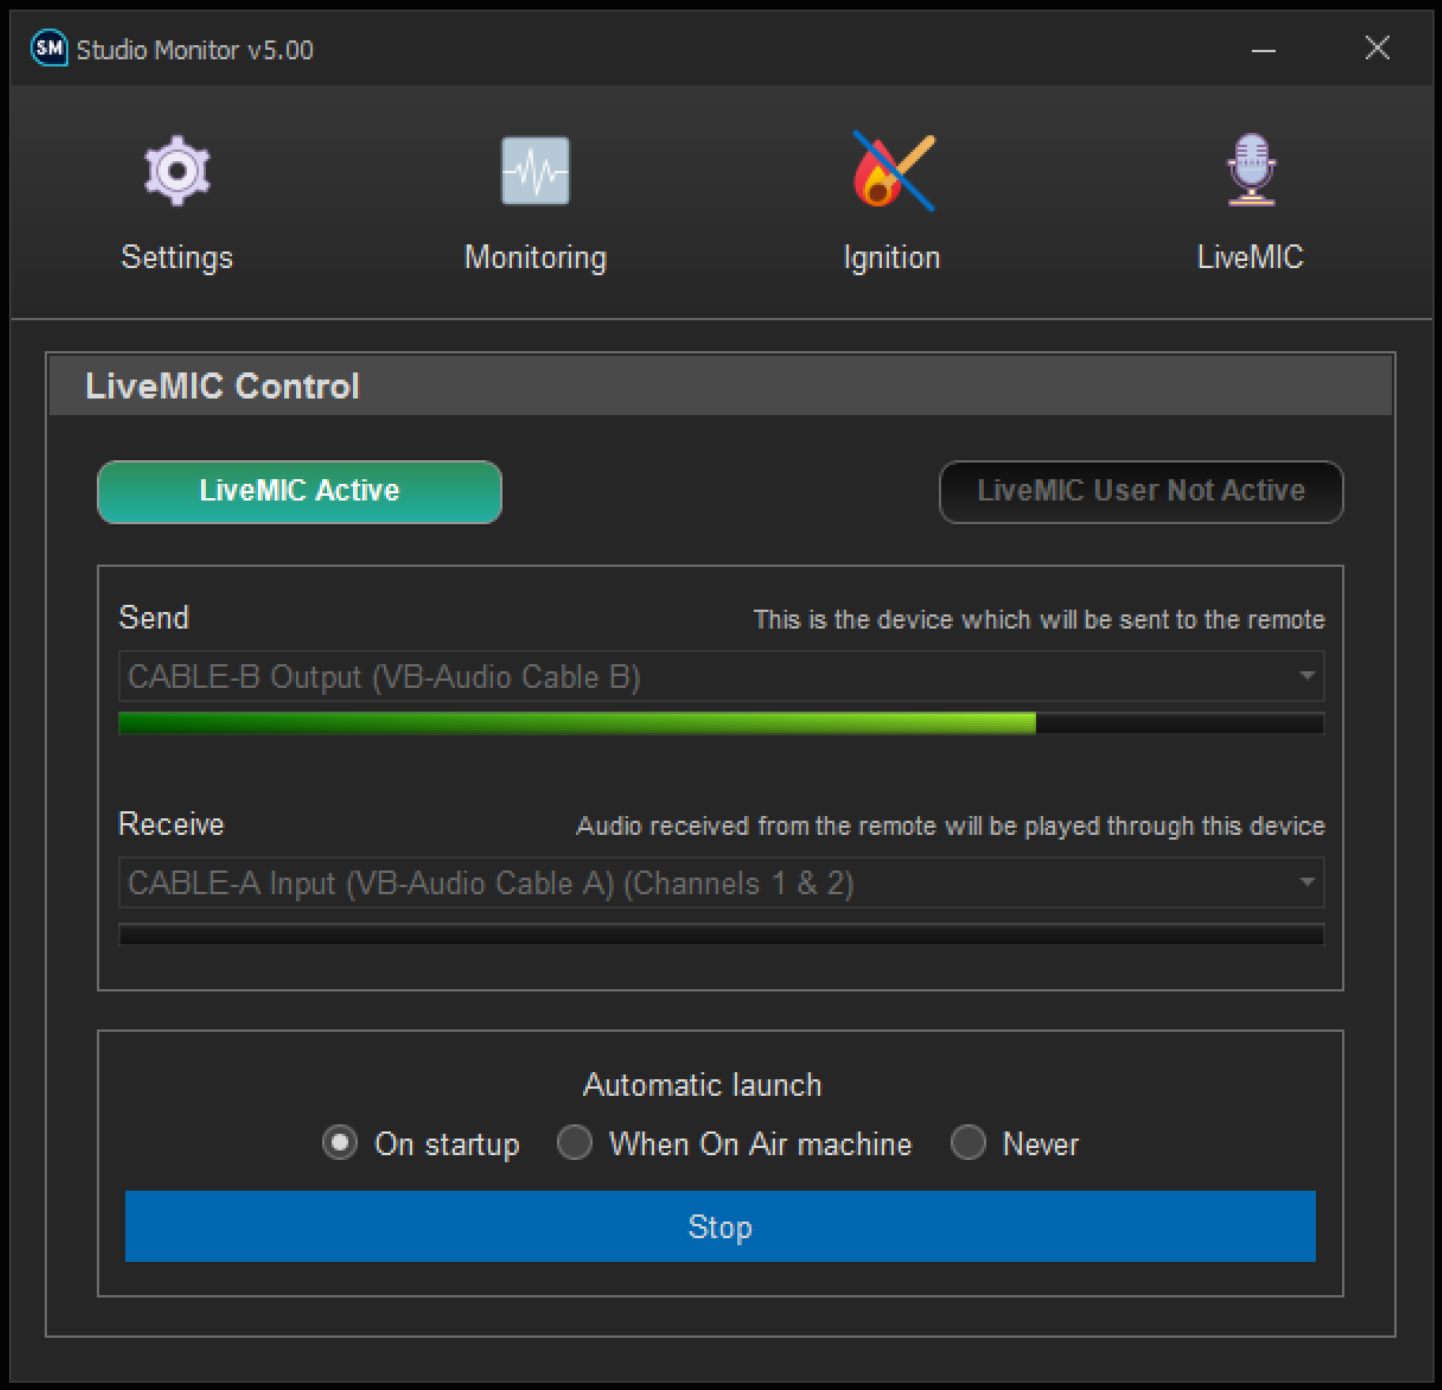
Studio Monitor is the conduit between the studio and LiveMIC on the remote computer.
See the PlayoutONE Studio Monitor section for instructions on how to set it up for LiveMIC.